
Weaving Fabric with a Handmade Loom
Have you ever wanted to weave your own fabric into a unique cloth but didn’t quite know where to start? Or maybe you’ve see a t-shirt area rug and wondered how to make your own?
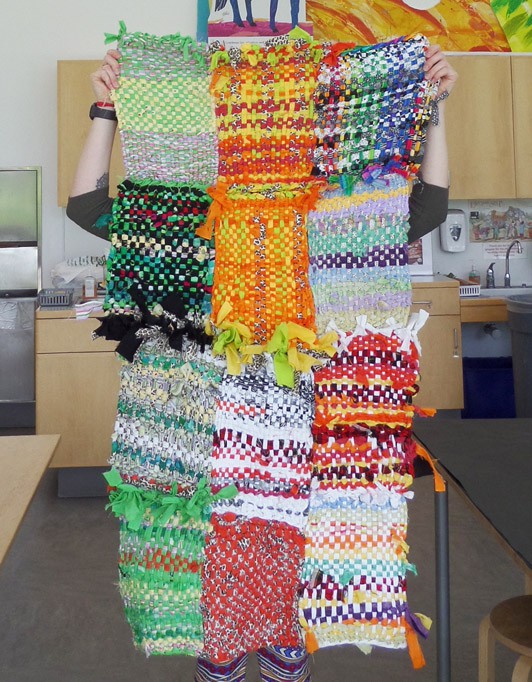
This post will show you how to make your own wooden loom and turn ordinary strips of scrap fabric into beautiful hand-woven swatches to display or give as gifts. For those of you feeling more adventurous, the swatches can be stitched together to create larger pieces, like the one pictured above that Art Studio guests helped us make. The individual swatches were stitched together into a wall display. Make a comfortable floor mat or rug, blanket, pet bed or anything else you can imagine!
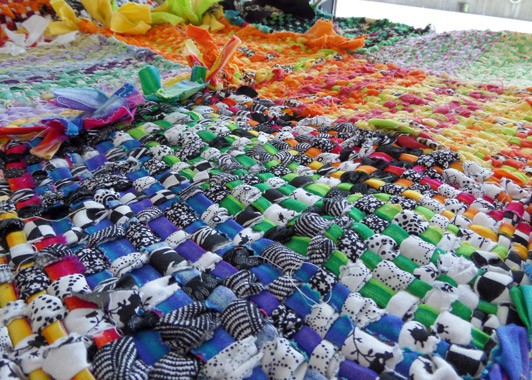
First you have to make a loom. You may be able to find one online to save time, I only found yarn peg looms on my quick Amazon.com search. The loom needs to be big enough to accommodate fabric on the pegs instead of just yarn so you’re better off making your own. As long as you have basic woodworking skills, hand saw, drill and large drill bit and wood glue you can make one in an hour or two.
Wooden Loom Instructions
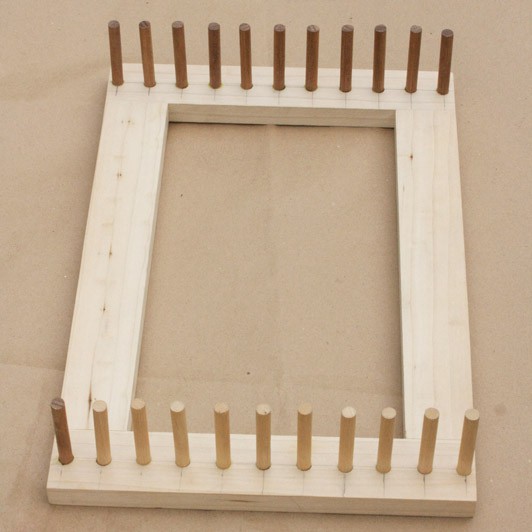
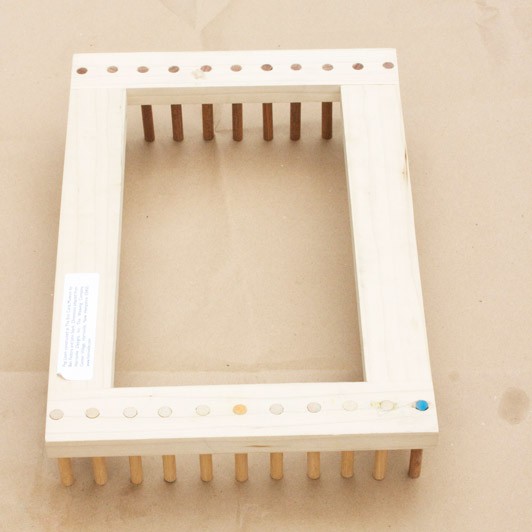
Our handmade frame is made from cut wooden scraps glued together into a rectangle. You could make your frame any dimensions you like, ours is 9-inches x 12-inches.
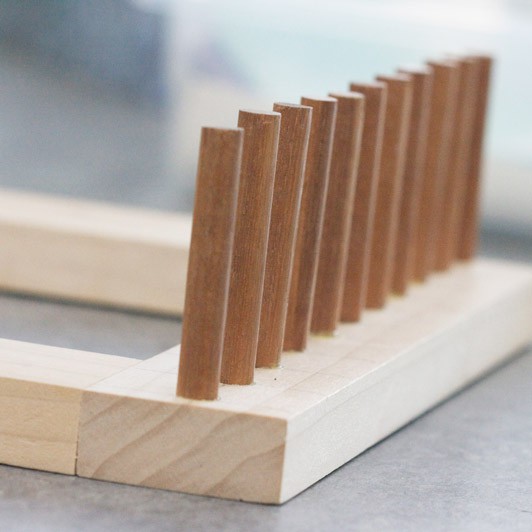
After cutting, sanding and gluing your pieces of wood together into a frame, evenly space marks for your dowels about 1.5-inches apart with a pencil and ruler. We have 11 dowels on either end of our loom, but after choosing the dimensions you want for your loom, just measure in 1.5-inch increments across the shortest sides of your loom in the center of the strips of wood.
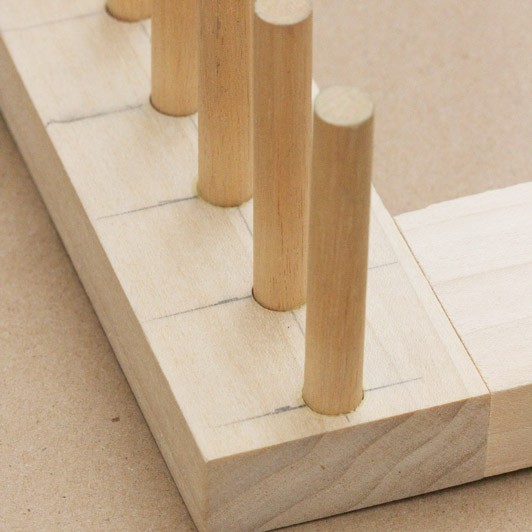
Using a drill bit as wide as the dowels you intend to use for the pegs, drill holes completely through the wooded base. We used 3/8-inch diameter dowels and cut them in 3-inch lengths. Use wood glue to secure the dowels in each hole and let your loom dry overnight.
Weaving Instructions
Now the fun can begin! Here’s a little vocabulary to help understand some of the language we’ll be using in the next part of this tutorial:
WARP- In weaving, the warp is the set of lengthwise (long) yarns through which the weft is woven.
WEFT- The weft is the yarn which is drawn under and over parallel warp yarns to create a fabric.
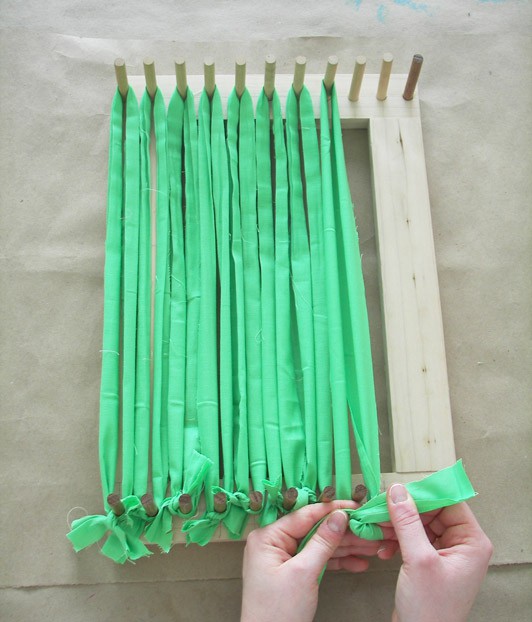
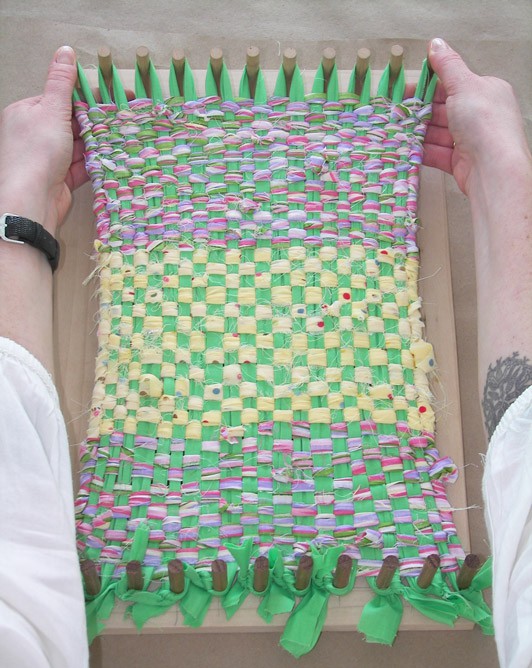
START by “warping” the loom. Use long strips of fabric, twice the length of your loom plus a few inches, to loop around the top and bottom pegs of the loom. Keeping the material tight, knot the fabric at the bottom of the loom.
Prepare some long strips of fabric for your weaving. We used a mix of 100% cotton fabrics, cut from donated clothes and “fat quarter” packs we purchased at our local Jo-Ann Fabrics store in a fun mix of patterns and bright colors. Make your strips as long as you can, and about 1-inch wide.
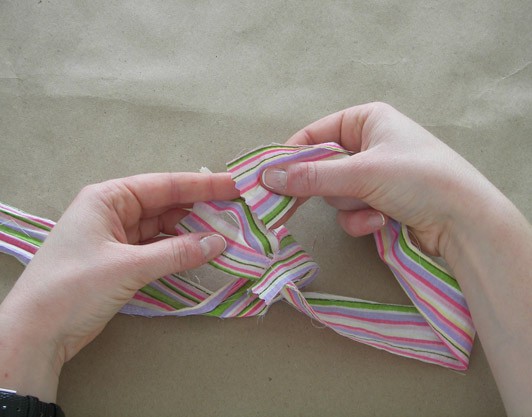
On both ends of each of your fabric strips cut a small slit. Connect the strips by pulling one strip through the slit of another strip and then looping the fabric through (did you follow me? Sorry, it’s confusing to explain but I swear it’s easy to do!).
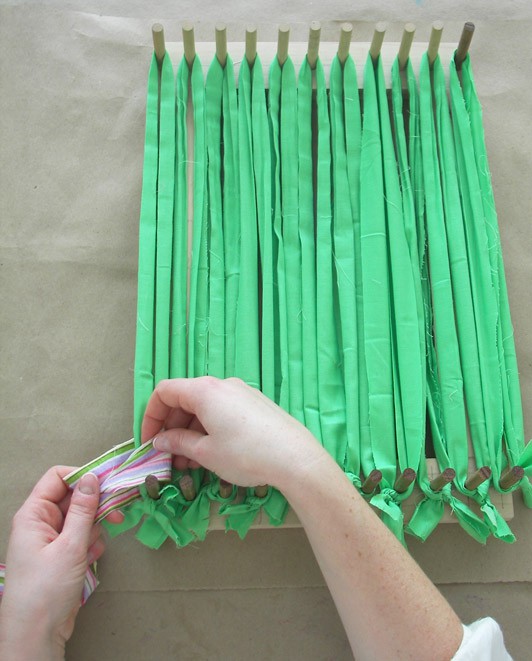
Attach the first “weft” fabric strip to the bottom corner of the warp thread by looping it through one slit on the end of your first strip. Now you can begin weaving your cloth!
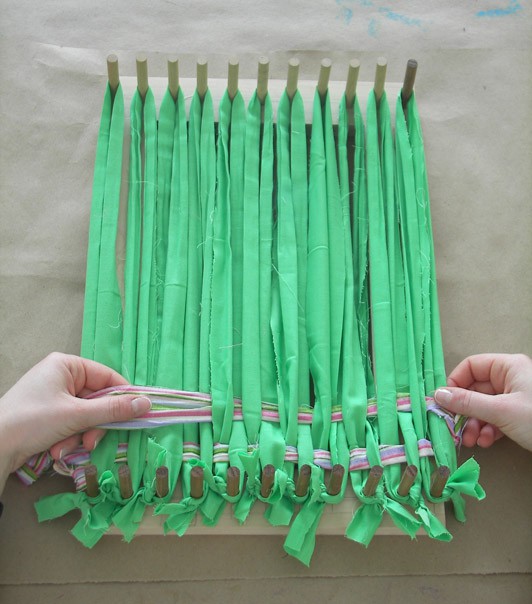
WEAVE the material over the first thread then under the second—over the third and under the fourth—all the way to the other side of the loom. Now, come back again weaving over and under all the way to the other end. Continue weaving this way, back and forth, until you reach the top of the loom. To add more to your cloth, use the slits on each end of the fabric strips to interlock them.
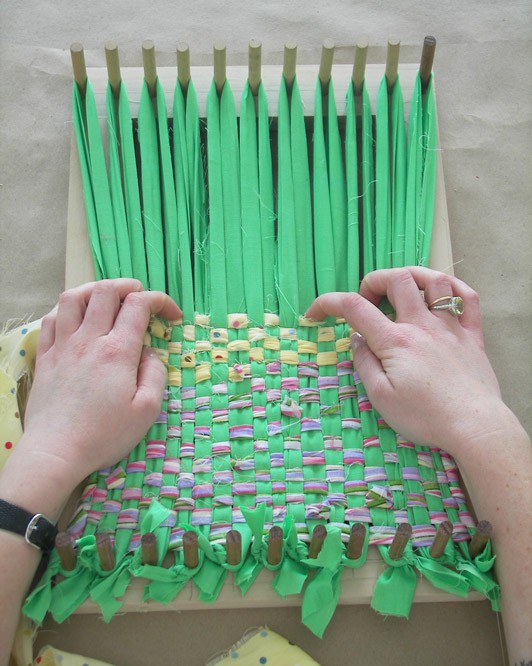
REMEMBER After you complete a row, use your fingers to tap it down against the row before it. This helps keep the weaving tight and even.
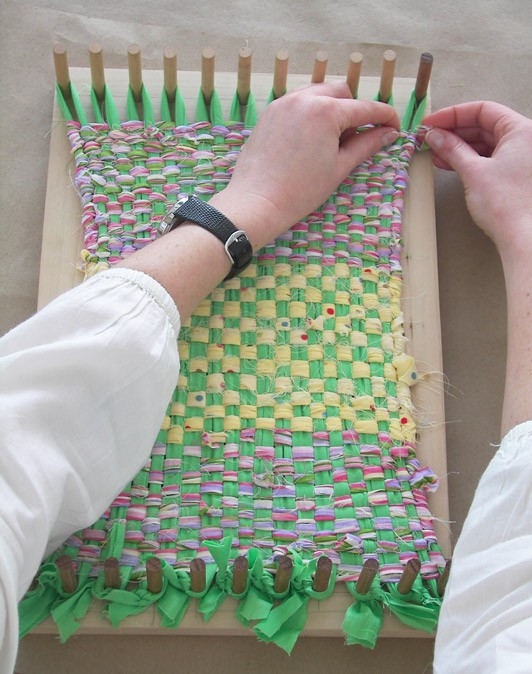
FINAL ROW Secure the final strip (so it won’t unravel) by pulling it back into the weaving with your fingers or an unfolded paper clip. Then you can carefully remove your weaving from the loom by pulling it evenly up and off the pegs.
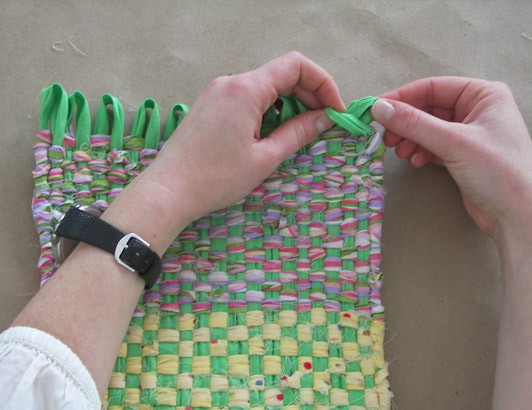
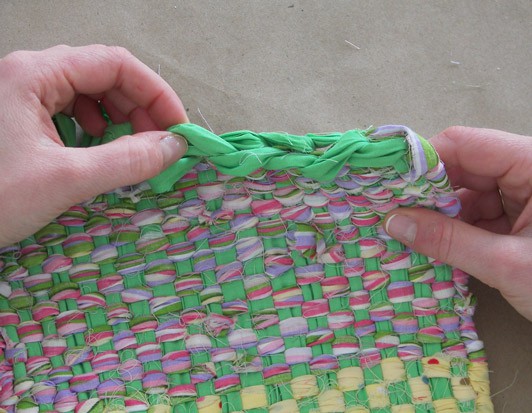
FINISH Once you remove the weaving from the loom, you’ll need to finish off the top to keep it in tact. Starting at one end, loop the warp fabric through each other until you get to the other side. Use your fingers or an unfolded paper clip to secure the last loop back into the weaving.
If you made it to the bottom of this post, congratulations! Your cloth is finished and you’re now ready to make your own fabric to turn into whatever you can imagine.
Making Art with Children is generously sponsored by the Massachusetts Educational Financing Authority.

